


Replacing the battery in your garage door opener is a simple and cost-effective way to ensure your garage door operates smoothly and reliably. Over time, the battery that powers your garage door opener’s remote control or the backup power source within the opener itself can weaken or die, causing inconveniences and potentially leaving your garage door inoperable.

In this guide, we will walk you through the steps on how to replace a garage door opener battery, ensuring that you can quickly and safely restore full functionality to your garage door system. Whether you’re dealing with the remote control or the main unit’s backup battery, this guide has you covered.
Tools and Materials Needed to Replace a Garage Door Opener Battery
Before you start the process of replacing your garage door opener battery, it’s essential to ensure you have all the necessary tools and materials at hand. Having everything ready beforehand will streamline the process and make it more efficient.
Screwdriver
A screwdriver is a crucial tool for this task. Depending on your garage door opener model, you might need a Phillips or flat-head screwdriver. The screwdriver is primarily used to open the battery compartment. It’s advisable to have both types of screwdrivers ready, as some models may have different screws securing the battery cover.
New battery
It’s important to have the right replacement battery for your garage door opener. The type of battery needed can vary depending on the model of the garage door opener. Commonly, a 12-volt battery is used, but it’s crucial to check the manual or the old battery’s labeling to purchase the correct type and size.
Safety gloves
When dealing with electrical components, always prioritize safety. Wearing safety gloves will protect your hands from any sharp edges inside the battery compartment and potential chemical leaks from the old battery. It’s a simple precaution that can prevent minor injuries.
Step-by-Step Guide on How to Replace a Garage Door Opener Battery
Replacing the battery in your garage door opener is a straightforward process that most homeowners can accomplish with minimal tools and technical skills. Below is a step-by-step guide that walks you through the entire process.
Step 1: Power off the Garage Door Opener
The first step in the process is to ensure your safety by cutting the power supply to the garage door opener. This can typically be done by either unplugging the opener from the power outlet or by turning off the circuit breaker that supplies power to the garage. This step is crucial to prevent any accidental activations of the door while you’re working on the opener.
Step 2: Locate the Battery Compartment
Next, you need to locate the battery compartment on your garage door opener. Most garage door openers have the battery compartment either at the back or on the bottom of the unit. In some cases, it might be clearly marked, but if not, referring to the user manual can provide guidance on where the battery compartment is located.
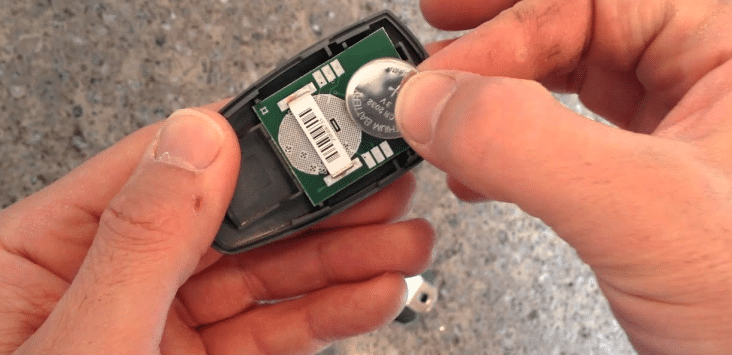
Step 3: Remove the Old Battery
Once you’ve located the battery compartment, use your screwdriver to open it. This may involve removing screws that hold the cover in place or unclipping a plastic cover. After gaining access to the compartment, carefully disconnect the old battery. Pay attention to how the battery is connected, noting the orientation of the positive and negative terminals, as this will be important when installing the new battery.
Step 4: Insert the New Battery
After safely removing the old battery, it’s time to install the new one. Before insertion, verify that the new battery matches the specifications of the old one. Then, insert the new battery into the compartment, ensuring that the positive and negative terminals are aligned correctly according to how the old battery was connected. Improper installation can lead to the garage door opener not functioning correctly.
Step 5: Close the Battery Compartment
Once the new battery is securely in place and connected, the next step is to close the battery compartment. If you had to unscrew the compartment cover, replace the screws and tighten them using your screwdriver. Make sure the cover is secured properly to prevent any dust or debris from entering the compartment, which could potentially damage the new battery.
Step 6: Test the Garage Door Opener
After everything is back in place, it’s time to test the garage door opener to ensure it’s functioning correctly with the new battery. Restore power to the opener by plugging it back in or turning on the circuit breaker. Use the remote control or wall button to activate the garage door opener. It should respond promptly and operate smoothly. If the opener does not work, double-check the connections and ensure the battery is installed correctly.
Replacing the battery in your garage door opener is a simple task that can significantly improve the functionality and reliability of your garage door system. Not only does it ensure that your garage door operates efficiently, but it also serves as a preventive measure against unexpected malfunctions due to a depleted battery.
By following this step-by-step guide, homeowners can easily undertake this maintenance task themselves, saving time and potentially, the cost of hiring a professional. Remember, maintaining the components of your garage door system, including the opener battery, will contribute to the overall longevity and performance of your garage door.
How to Test the Health of Your Garage Door Opener Battery
Maintaining your garage door opener’s battery health is crucial for uninterrupted operation. A malfunctioning opener can disrupt your routine, often due to a weak battery. Regular battery testing is essential to catch issues early and prevent inconvenient breakdowns. In this guide, we’ll show you how to test your garage door opener’s battery effectively. By following these steps, you can ensure your opener functions reliably, saving you from unexpected hassles and repair costs.
Step 1: Locate the Battery Compartment
To begin, find the battery compartment on your garage door opener. This compartment is typically situated on the back of the opener unit, which is mounted on the ceiling of your garage. However, its exact location might vary depending on the make and model of your opener. You may require a screwdriver to open it securely.
Step 2: Access the Battery
Once you’ve located the battery compartment, open it up to access the battery. This may involve unscrewing a cover or sliding a panel, depending on the design of your garage door opener. Ensure that you handle the compartment carefully to avoid any damage to the opener or the battery.
Step 3: Use a Digital Multimeter
For an accurate assessment of the battery’s health, use a digital multimeter. Set the multimeter to the DC voltage setting, typically indicated by a symbol resembling a “V” with a straight line above a dotted line. This ensures that the multimeter is configured to measure direct current (DC), which is what batteries produce.
Step 4: Measure Voltage
With the multimeter set to the appropriate setting, proceed to measure the voltage of the battery. Carefully touch the multimeter’s red probe to the positive terminal of the battery and the black probe to the negative terminal. This allows the multimeter to gauge the electrical potential difference, commonly referred to as voltage, across the battery.
Step 5: Interpret Reading
After making the connection, observe the reading displayed on the multimeter. A healthy 12-volt battery should register slightly above 12 volts on the multimeter. If the reading falls below this threshold, it indicates that the battery’s charge has depleted, rendering it weak and in need of replacement.
Step 6: Utilize Built-in Battery Health Indicator (Optional)
Alternatively, if your garage door opener is equipped with a built-in battery health indicator, you can utilize this feature for a quick assessment. This indicator is often activated by pressing a designated button, causing lights to flash or a digital readout to display, indicating the battery’s status without requiring the use of a multimeter.
Step 7: Refer to Owner’s Manual
If your garage door opener incorporates a built-in battery health indicator, refer to the owner’s manual for specific instructions on its operation. The manual will provide guidance on how to interpret the indicator’s signals accurately and any necessary steps to take based on the indicated battery status.
Step 8: Regular Testing
To ensure the continued reliability of your garage door opener, make it a habit to test the battery’s health regularly. Ideally, perform this test every six months as part of your routine maintenance schedule. Regular testing allows you to proactively identify any issues with the battery and take appropriate action before it causes operational problems.
Step 9: Test After Significant Events
In addition to regular testing, it’s essential to test the battery’s health after any significant events that might impact its performance. For instance, following a power outage or if you notice any signs of sluggish operation from the garage door opener, promptly test the battery to determine if it requires replacement. This proactive approach helps prevent unexpected malfunctions and ensures the continued smooth operation of your garage door opener.
Regularly testing your garage door opener’s battery is a simple yet vital maintenance task. Whether using a digital multimeter or built-in indicators, monitoring battery health every six months can prevent unexpected malfunctions. By staying proactive, you can enjoy a smoothly functioning garage door opener, sparing yourself from inconvenience and unnecessary expenses.
How to Extend the Lifespan of Your Garage Door Opener Battery
Maximizing the lifespan of your garage door opener battery not only ensures continuous, seamless operation but also can save you money and time on frequent replacements. Follow these guidelines to extend the life of your garage door opener battery:
- Choose High-Quality Batteries: Investing in a high-quality battery is the first step toward extending its lifespan. Quality batteries are specifically designed to endure the rigors of powering a garage door opener, offering better performance and longer life.
- Maintain Proper Usage: Avoiding unnecessary use of your garage door will help extend the battery’s life. Frequent activations can quickly deplete the battery, so try to minimize the number of times you open and close the garage door when it’s not strictly necessary.
- Keep the Door Mechanism Well-Maintained: A garage door that operates smoothly demands less power from the opener and, by extension, the battery. Ensure that the door’s tracks are lubricated and that springs and cables are in good condition. The less strain on the door mechanism, the lower the strain on the battery.
- Regulate Temperature Extremes: Batteries are sensitive to temperature extremes. High temperatures can cause batteries to overheat, while cold temperatures can decrease their capacity. While it’s not always possible to control the environment around your garage door opener, taking steps to insulate the garage can help mitigate extreme temperatures.
- Monitor Battery Health: Regularly testing the battery, as previously described, is crucial for extending its life. Monitoring battery health allows you to detect when its performance begins to decline, enabling you to take proactive steps before it fails completely.
- Avoid Using Outdated Batteries: Always check the manufacture date when purchasing a new battery. Batteries lose their effectiveness over time, even if they haven’t been used. Installing a new but outdated battery could result in a shorter lifespan.
- Disconnect the Battery When Power is Out: If you anticipate a long duration without electricity, such as during a planned power outage, disconnect the battery from the opener. This prevents the battery from discharging completely, which can extend its life.
- Use a Battery Maintainer: For garage door openers that are infrequently used, such as those in vacation homes, a battery maintainer can keep the battery charged and in good condition during prolonged periods of inactivity.
By following these suggestions, you can significantly extend the lifespan of your garage door opener battery, ensuring reliable operation and potentially saving costs on replacements over time. Regular maintenance and care are key to the longevity of all components of your garage door opener system, with the battery being no exception. Remember, a well-maintained garage door opener battery is instrumental in ensuring the convenience and security that come with an automatically operated garage door.
Frequently Asked Questions
When it comes to replacing the battery in your garage door opener, several questions might arise, ranging from the type of battery you need to the signs that indicate it’s time for a change. Here, we probe into some of the most common queries, providing you with detailed, easy-to-understand answers aimed at making your battery replacement process as smooth as possible.
What type of battery does my garage door opener need?
The type of battery required for your garage door opener largely depends on the model and manufacturer of your device. Most garage door openers use one of the following types of batteries:
- 12V or 9V alkaline batteries: These are standard sizes and are commonly used in many household devices, including some garage door opener models.
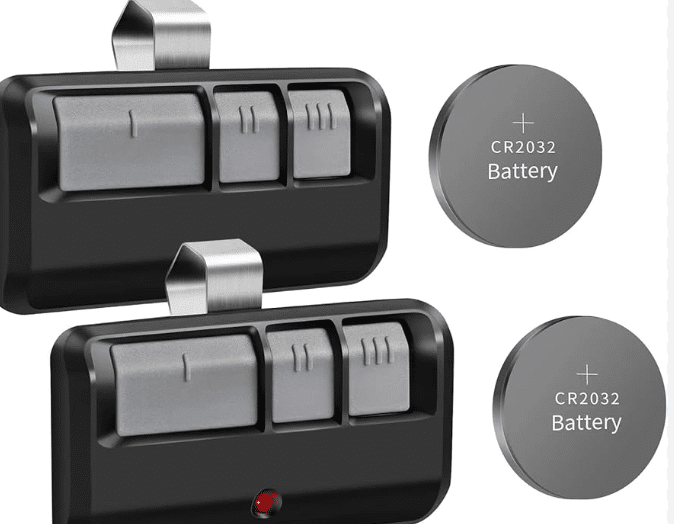
- Lithium CR2032 or CR2025 batteries: These coin-shaped batteries are typically used in garage door opener remotes and keypads.
It’s crucial to check your garage door opener’s manual for the manufacturer’s battery recommendation. Using the wrong type of battery can lead to poor performance or even damage the device.
How do I know when to replace the battery in my garage door opener?
There are a few signs that indicate it’s time to replace the battery in your garage door opener:
- Delayed response: If your garage door starts to open or close more slowly than usual, it could mean the battery is weakening.
- Intermittent operation: When the garage door opens or closes sporadically or stops midway, it’s often a sign of a dying battery.
- No response: The most apparent sign is when the garage door opener fails to respond to the remote or keypad commands.
Regular maintenance checks every 6 to 12 months can help identify when a battery change is necessary before these issues arise.
Can I replace the battery in my garage door opener myself?
Yes, in most cases, replacing the battery in your garage door opener is a simple DIY project that requires minimal tools. Here’s what you generally need to do:
- Gather the necessary tools and replacement batteries based on your opener’s model and manufacturer’s instructions.
- Access the battery compartment, which is typically located at the back of the motor unit for the opener or inside the remote or keypad.
- Remove the old battery, taking care to note the orientation for proper installation of the new one.
- Insert the new battery, ensuring it fits securely in place and is oriented correctly.
- Test the garage door opener to confirm it’s working correctly with the new battery.
Always refer to your garage door opener’s manual for specific instructions and safety precautions tailored to your model.
Is it necessary to reset the garage door opener after battery replacement?
In most instances, replacing the battery in your garage door opener or its remote does not require you to reset the system. However, if you encounter issues with the opener’s functionality after the battery change, you may need to reset the opener according to the manufacturer’s instructions. This can involve steps like reprogramming the remote or recalibrating the opener to ensure smooth operation.
Understanding when and how to replace the battery in your garage door opener ensures that your system operates efficiently and reliably. With the answers to these frequently asked questions, you’re now equipped to tackle the replacement process confidently, ensuring continuous, hassle-free operation of your garage door.
Conclusion
Replacing a garage door opener battery is a simple yet essential task that keeps your garage door operating smoothly and reliably. By following the steps outlined in this guide, you can ensure that your garage door opener has the power it needs to function properly, enhancing the safety and convenience of your home. Regular maintenance, including battery replacement, is key to ensuring a long lifespan for your garage door opener.
End Note
Remember, a well-maintained garage door opener not only offers peace of mind and security but also contributes to the overall well-being of your home. Regular checks and battery replacements are key. For garage door service providers aiming to expand their reach, partnering with Door Domination, the best Garage Door SEO Marketing company, can help elevate your business to new heights. Stay proactive, stay visible, and ensure your garage door services are recognized and appreciated by those who need them most.